Education Laugh and Learn
Come Grow With Me: Episode 1
Come Grow With Me: Episode 2
Come Grow With Me: Episode 3
Come Grow With Me: Episode 4
Winter Porch Pots 101
Garden Trends in 2020

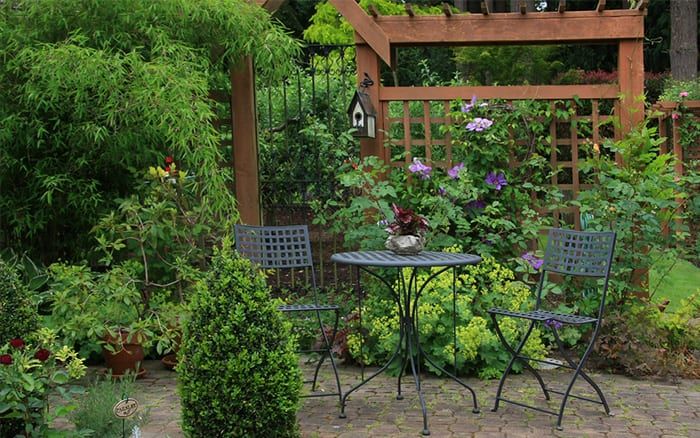
Secluded Spaces and Garden Nooks:
The concept of garden nooks is certainly not a new one, but the idea is gaining renewed popularity as we all continue looking for that work-life balance. The ultimate goal in planning any outdoor environment is finding the right combination of lush growth and comfortable, inviting spaces that you want to be in. Private corners of a yard can be easy to transform into sweet, secluded spots that are ideal for reading, quiet conversations, meditation or even dining al fresco. It is simple to create a space that’s both secluded yet inviting. It is best to keep seating comfortable, cozy and small. Establishing a boundary is easy using a vine covered trellis, arbor or even tall-growing hedges. You can always build an actual structure too, if the budget is big enough. Adding a water feature or an outdoor firepit can put the final touches on any outdoor secluded sanctuary.

Bringing the Foodie Experience Full Circle
Growing your own food is continuing to increase in popularity as people become more concerned with what they eat and how it's grown. My most popular classes attest to that truth, as whenever I host a vegetable or herb class I have a full house. It no secret that growing your own food is not only satisfying, it’s yummy too. I’m excited to see vegetable gardening merge with the outdoor entertaining trends: I hosted my own “farm to table” party over the summer where we all made our own dishes and outside of the meat, everything was from the garden. It was great! It can be as simple as sprinkling fresh basil and other veggies on top of a pizza before barbequing it or picking some fresh sprigs of mint for a mojito. More and more “Farm to Table” restaurants are springing up as well.
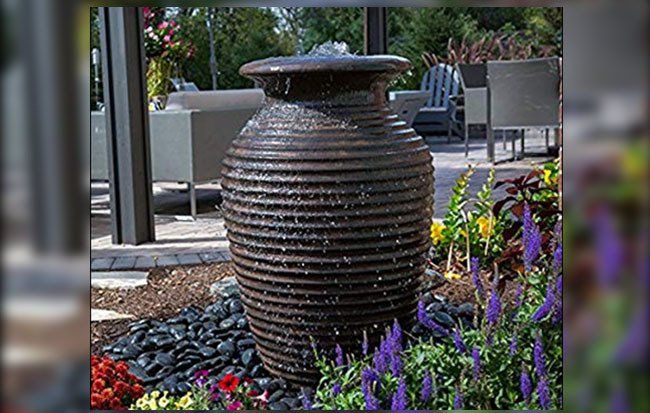
Adding Water for Yourself and the Birds
The presence and sound of water in the garden is sparkly, restorative, refreshing, and relaxing. More and more gardeners are turning their gardens into retreats for relaxation, and including a fountain is part of the plan. I regularly sell out of fountains whenever I bring them to the Klehm Garden Show and I seem to be always restocking them in the store. If a fountain isn’t your thing, consider adding a bird bath. Birds need clean water to bathe and drink, so placing a birdbath in your garden and cleaning the water regularly will make a huge difference for birds in your area.

Growing Succulents still trending for 2020
Although they have been around for many years, succulents are still a big gardening trend. One thing that makes them popular is they grow well in hot, dry environments where other plants may not do so well. While easy to grow, succulents do require care to survive and thrive. Succulents alone or in beautiful combinations, in every size continue to be a hot décor trend in all sorts of styles. Succulents come in an amazing number and variety of unique, even strange, forms, shapes and colors. Whether you have simple clay pots or very colorful or ornate ones you can find a combination of succulents to create a striking display. Succulents are unique and easy to care for plants with the right amount of light.
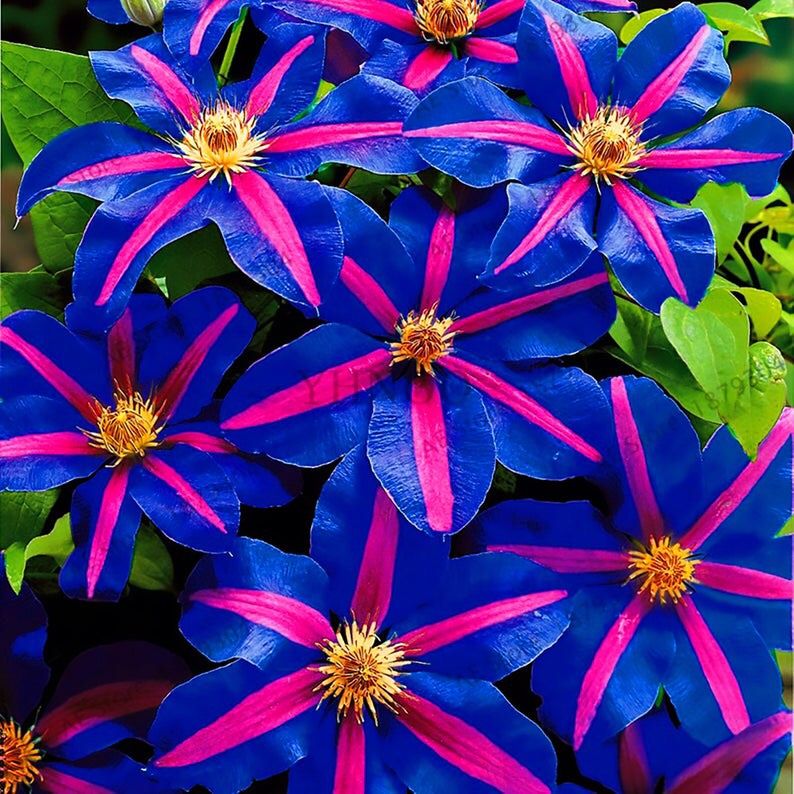
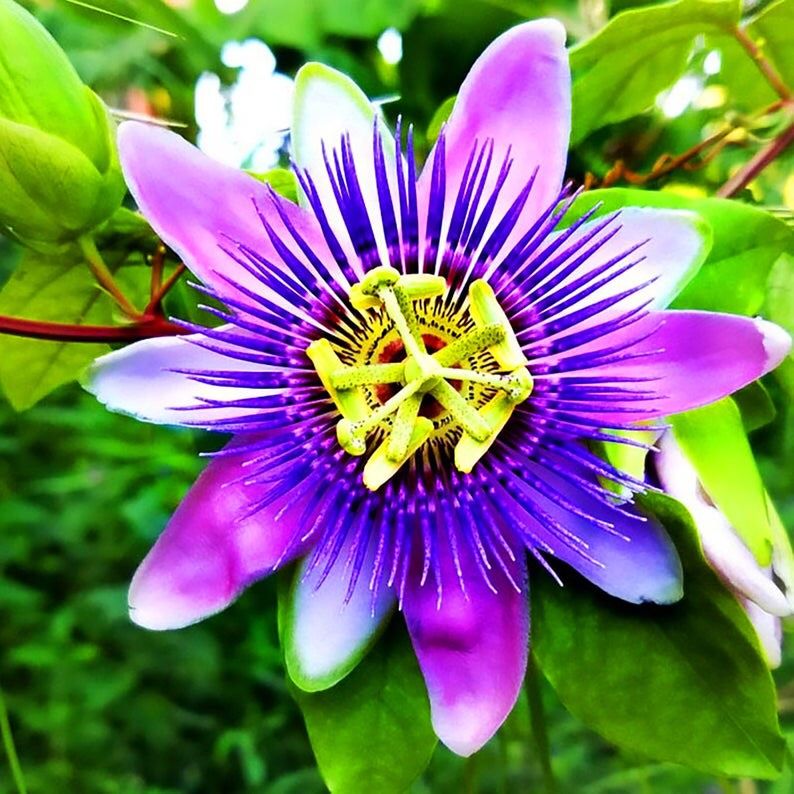
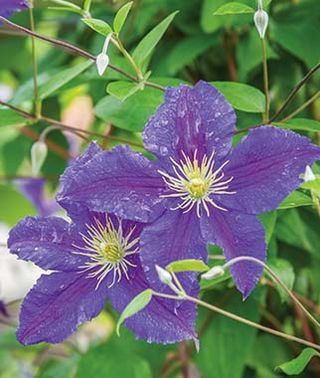
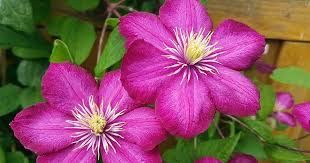
Growing Clematis
For proper care of clematis, clematis vines prefer sunny locations (at least six hours of sun needed for blooming) but the soil should be kept cool. An easy way to accomplish this is by planting some type of ground cover or shallow-rooted perennial plants around the clematis. A 2-inch layer of mulch can also be incorporated to keep the roots cool and moist. Growing clematis vines must be supported in some fashion as well. The type of support system is usually dependent on the variety grown. For instance, poles are acceptable choices for smaller growing clematis vines, which can range anywhere from 2 to 5 feet in height. Arbors may be more suitable for growing larger types, which can get 8 to 12 feet. Most varieties, however, do quite well growing along a trellis or fence.
Clematis plants need plenty of space for adequate air flow as well as a rich, well-draining planting area. You should dig the hole large enough to accommodate the plant, with most recommendations suggesting at least a two foot depth of soil amended with compost prior to planting. It may also help to cut the plant back some before planting to lessen shock as it adapts to its new environment.
Annual pruning may also be required to keep clematis plants looking their best. Pruning clematis helps plants remain both attractive and full of flowers. The type of clematis vine grown dictates when and how it should be pruned. For example, early spring-blooming varieties should be pruned back as soon as possible following their blooming but before July, as they bud on previous season’s growth. Large flowering types that bloom in mid spring should be cut back to the topmost buds in late winter/early spring. Late-blooming varieties should be pruned back about two or three feet in late winter/early spring.
Before you get started, there are a couple tips for pruning clematis that you should know: Dead or damaged stems may be removed at any time when pruning clematis vines. Damaged plant parts will never be productive, so get rid of them as soon as they are noticed. Know when your clematis blooms. You may want to wait until the second year to prune clematis, especially if it is the large flowering variety. Always prune clematis when flowering is finished.
If you prune clematis immediately after bloom time is finished, you won’t have to worry about removing next year’s flowers. Prune clematis for shape at this time, removing up to one third of the plant, if needed. Avoid removing woody stems, if possible. Clematis pruning groups include those that flower on new growth and those that bloom on last year’s woody stem. Once you’re familiar with the bloom time of your clematis, you will be able to prune the vine before buds begin to develop. When deciding how and when to trim clematis, don’t remove a developing bud. If you see buds developing when pruning clematis vines, you may be pruning at the wrong time. Flowers that bloom in spring grow on old wood. Blooms of this clematis developed during last year’s growing season. Plants in this clematis pruning group should be pruned before the end of July to allow blooms for next year. Pruning clematis vines that flower in summer or fall should be done in early spring, as these flowers are produced on the current year’s growth. Large flowering hybrids may produce a second set of blooms. Deadhead spent flowers for another series of blooms, though they will likely be smaller than the first, as these appear on new growth. When deadheading the first blooms, as much as 12 to 18 inches of stem.
Best Flowers for a Cutting Garden
Gladioli, Sunflowers, Peony,
Daffodil, Zinnia, Black Eyed Susan,
Tulip, Delphinium, Salvia,
Allium, Echinacea, Ranunculus,
Liatris, Rose, Coreopsis,
Yarrow, Aster, Dahlia
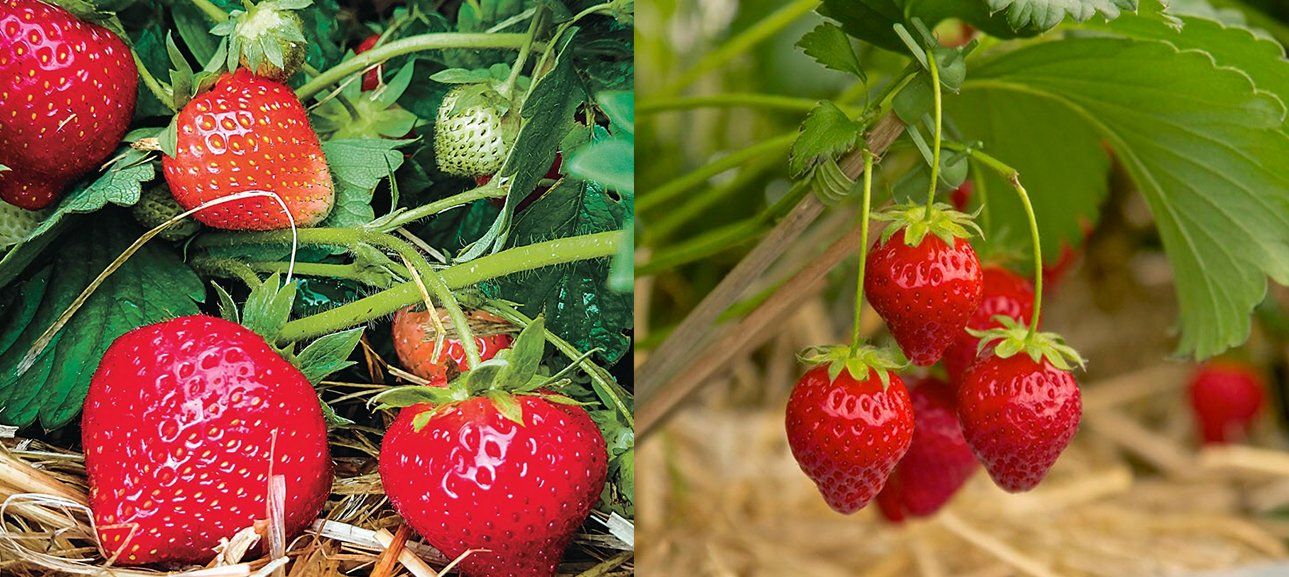
The good news is that strawberries are relatively easy to grow if you have full sun.
Strawberry plants come in three types:
Day-Neutral: This varieties produce buds, fruits and runners continuously if temperature are between 35-85 degrees. Production is less than that of Junebearers.
Everbearer: This variety forms buds during the long days of summer and the short days of autumn. The summer-formed buds flower and fruit in autumn, then autumn-formed buds fruit the following spring.
Junebearer: This variety produces buds in the autumn, flowers and fruits the following spring, and runners during the long days of summer.
For the home garden, we recommend Junebearers. Although you will have to wait a year for fruit harvesting, it will be well worth it.
Strawberry plants require 6-10 hours a day of direct sunlight, so choose your planting site accordingly. Strawberries are tolerant of different soil types, although they prefer loam. Ideally, begin working in aged manure or compost a couple months before planting. Soil pH should be between 5.5 and 7. If necessary, amend your soil in advance of planting. The planting site must be well-drained. Raised beds are a particularly good option for strawberry plants. Practice crop rotation for the most success.
Do not plant in a site that recently had strawberries, tomatoes, peppers, or eggplant. Strawberries are sprawling plants. Seedlings will send out runners, or ‘daughter’ plants, which in turn will send out their own runners. Make planting holes deep and wide enough to accommodate the entire root system without bending it. However, don’t plant too deep: The roots should be covered, but the crown should be right at the soil surface. Plan to plant as soon as the ground can be worked in the Spring. Buy disease-resistant plants from a reputable nursery, of a variety recommended in your area. Roots shouldn’t be longer than 8 inches when plants are set out. Trim them if necessary. Provide adequate space for sprawling. Set plants out 20 inches apart, and leave 4 feet between rows. Establish new plants each year to keep berry quality high each season.
In the first year, pick off blossoms to discourage strawberry plants from fruiting. If not allowed to bear fruit, they will spend their food reserves on developing healthy roots. The yields will be much greater in the second year. Eliminate daughter plants as needed. First and second generations produce higher yields. Try to keep daughter plants spaced about 10 inches apart. Moisture is incredibly important due to shallow roots. Water adequately, about one inch per week. Strawberry plants need a lot of water when the runners and flowers are developing and again in the fall when the plants are mature. Keep the beds mulched to reduce water needs and weed invasion. Be diligent about weeding. Weed by hand, especially in the first months after planting.
When the growing season is over, mow or cut foliage down to one inch and mulch plants about 4 inches deep with straw, pine needles or other organic material. This can be done after the first couple of frosts, or when air temps reach 20°F Remove mulch in early spring, after danger of frost has passed.
Row covers are a good option for protecting blossoms and fruit from birds.
Please find a picture of strawberries for the article
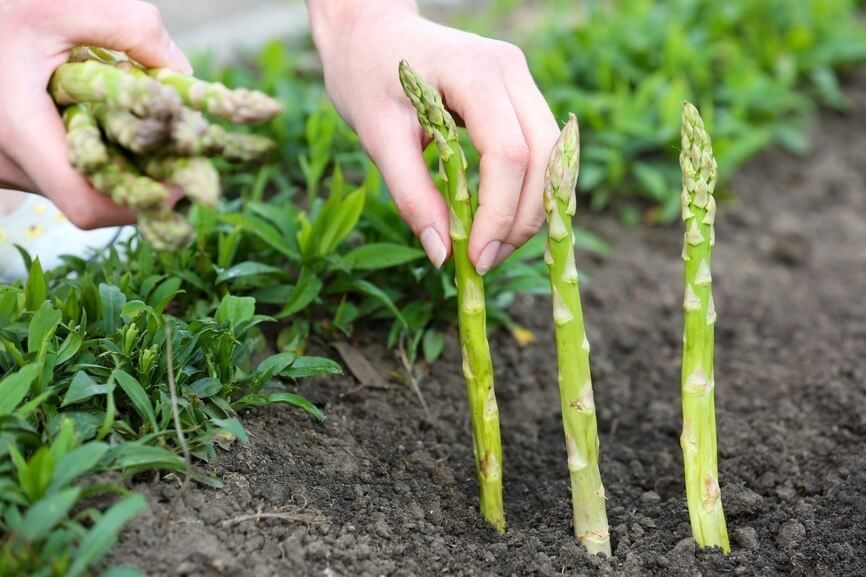
SO YOU WANT TO GROW ASPARAGUS
Asparagus can be started from seed, but it is much easier to start with 1-year old plants, called crowns. When buying crowns, select male hybrids since modern hybrids are disease resistant and male asparagus plants tend to produce larger spears than do female plants. The best thing about growing asparagus is that you should have to plant it only once. The normal life expectancy of asparagus is 20-30 years. There are many variations of proper planting methods, but this is how I did mine. I am growing mine in a raised bed. First, I tested the soil for pH. Asparagus do not like acidic soil, so I had to add limestone to my topsoil to bring my soil pH to 7. Next, I dug a trench that was about 12” wide and 6-8” deep. I just “eyeballed it” In the bottom of the trench, I added a 2” layer of compost and a smattering of rock phosphate (You could use aged manure in place of compost) Once the trench was prepared I placed the crowns in the bottom of the trench, spreading the roots of each plant as I went. You don’t have to be that precise in this as no matter what you do the roots will grow down and the shoots up. I spaced them about 18” apart. I planted 25 crowns in 2 rows spaced about 5’ apart
center to center. (This was for my family of 5) After setting the crowns, I covered them with several inches of top soil. As the plants grew, I continued to add soil to cover the shoots until the trench was completely backfilled. Once established, asparagus is one of the more drought tolerant vegetables, but during the 1st year, I watered the bed deeply once a week if it was not raining.
To keep your asparagus bed productive, don't be greedy. The first year after planting, you can harvest a few spears from each plant. Pick for about two weeks and then stop so the fronds can unfold and begin feeding the root system. Harvest for three weeks the next year, and four to six weeks after that. Pick too much, and your plants will not be able to develop the strong root system and energy reserves they'll need to produce an abundant crop of spears the following
season. Once the harvesting season has ended, which will be in late spring/early summer, allow the spears to develop naturally. They will grow 4' to 6' feet high, with lacy, light-green foliage. Keep the bed weeded, mulched and watered. The healthier the fronds, the more energy the plants will have for next year's harvest. When fall arrives, the fronds will turn yellow. At this time, it's generally best to cut the fronds about an inch above ground level and remove them from the area. This will help keep pests, such as the asparagus
beetle, from overwintering. It will also make sure your bed is neat and ready to go next spring.
Yes it takes a while, and a little work the 1st year, to get this going to really produce a lot of asparagus but in the end it is well worth it.
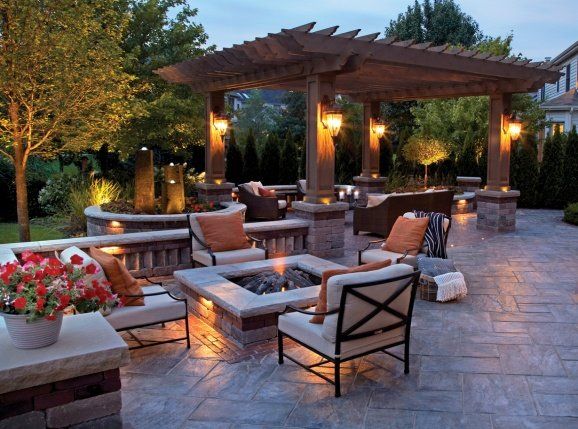
CREATE A “STAYCATION” SPOT
Why go on vacation once a year when you can make your yard feel like you’re on vacation all year round?” Gardeners are finding more ways to enjoy a “staycation” in the comfort of their own backyard.
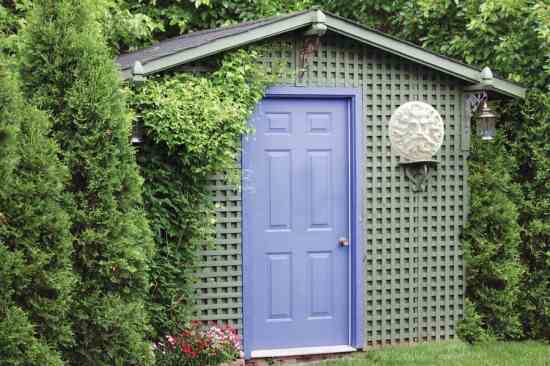
MAKING BACKYARD STRUCTURES
FOCAL POINTS
Some structures in the garden are necessary, sheds, walls, pool equipment boxes, etc. Since these are things you’ll see every day, why not make them beautiful? More gardeners will choose to make eye-catching structures the focal points of their gardens, rather than eyesores.
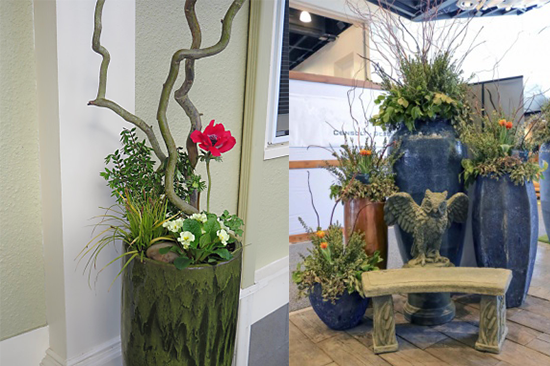
INCLUDING UNEXPECTED ELEMENTS IN
YOUR OUTDOOR POTS
Specimens that are not traditionally used in arrangements, sticks, leaves, dried seed heads, fruits, etc. have become increasingly popular in the floral design world, and chances are you already have something unique that truly reflects the season right in your own backyard. Not only will you create something gorgeous, but stepping outside and looking at your plants with fresh eyes is a refreshing pursuit that’s good for the soul. If possible, we suggest bringing a small child along with you for this activity. They’re often quite skilled at thinking outside the box and finding beauty in the unexpected!
INCLUDE PRIVATE, SECLUDED PLACES
A small retreat within a larger garden can feel like a getaway. Creating a quiet space to relax, read, or meditate is going to grow more and more popular as mindfulness and finding ways to decompress becomes a priority for people.
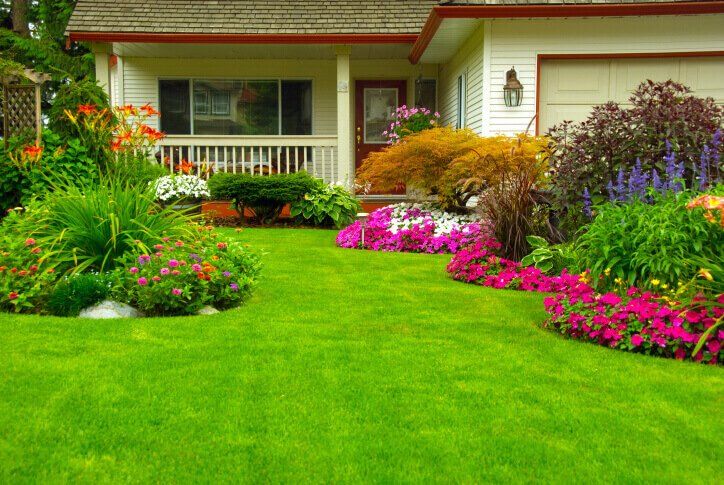
MAKING A NOTABLE FIRST IMPRESSION
Yes, a well-designed front yard adds curb appeal, but more importantly, it creates a sense of joy for you every time you return home. Homeowners have been finding creative ways to fashion an impactful entrance, and we don’t imagine them stopping anytime soon.
Visit us today to check out our garden and landscaping options.
4472 S. Mulford Rd
"Michelle Cox is an excellent source of knowledge! It doesn't matter if you're planting a vegetable garden for the first time, planting fruit trees on your property, or simply trying to make your wife happy and redo the flower beds, she has an answer and is more than happy to help! Great customer service and knowledgeable staff."
Nathan Shugart
